As a partner to the consulting firm with the #1 Cloud seats deployed, I have the unique opportunity to have frequent exposure to companies moving into Office 365 for SharePoint! It’s been very exciting to watch as Microsoft begins to close the gap between on-premises and online SharePoint environments. As such, I am seeing a gap in knowledge as those of us consultants and also internal SharePoint folks all struggle to keep up with all of the versions of SharePoint. It used to be that the critical differences were between Foundation, Standard, and Enterprise; then we would transition as new versions were released. Now we have to know all of the different types of Office 365 users (what is a kiosk user!?!) in addition to knowing how each of those 365 levels (Small Business, E1, E2, etc) and then how do they map to SharePoint functionality?! Yikes!! It’s a lot to handle. I am starting the “Did you know??” series in an effort to start bridging the gap (or is it a canyon?) I’m going to start with the most useful functionality I’ve found and deployed with my clients and we’ll work into more of the nitty gritty details ![]()
This first blog is going to focus on my favorite part of SharePoint Online and a feature that is ONLY available to SharePoint Online. This functionality is available across all of the SharePoint Online offerings, even Small Business!
External Sharing with SharePoint Online
Gone are the days of the “SharePoint for intranets” license where you had to pay an arm and a leg to allow external users to log in and collaborate with your internal employees. In fact, in all versions of SharePoint (on-premises and online) external users are now free. It’s important to note, Microsoft defines an external user as a person who has been granted access to your site, but who is not a licensed user within your organization. External users are not employees, contractors, or onsite agents for either you or your affiliates. (ie. anyone you used to put in the “extranet”)
So fantastic! Why write a blog all about free external users? Well…you also don’t have to manage the accounts anymore!
That’s right, those users no longer have to be in YOUR active directory. They also don’t have to be stored in a SQL database, with passwords being transmitted in clear text. Think of the benefits! Your helpdesk is already cheering because they know they get out of those darn password reset phone calls.
As a site owner, the only thing you have to do is invite an external user using their existing email address. That’s it! I will get into the details of that here in a minute.
The external user can log in immediately after being invited if their email happens to be an organizational Office 365 account. For those that still have traditional email, they can associate their work email address to a Microsoft Live account for access. That’s pretty easy too! For more information on setting up a live account see my blog Live Email Setup – a template for vendors.
Configuration of External Users on Office 365
By default, External sharing is turned off. For obvious reasons! If you do not wish for your employees to be sharing their data outside of the company, then by all means, you should leave external sharing off. Fortunately, external sharing be enabled by each site collection listed in your admin center. So you can choose which sites have it, and which don’t. If you aren’t familiar with the difference between a site collection and a sub-site click here.
To enable external sharing, navigate to your Office 365 admin center.
From the Admin drop down in the upper right hand corner, select SharePoint.
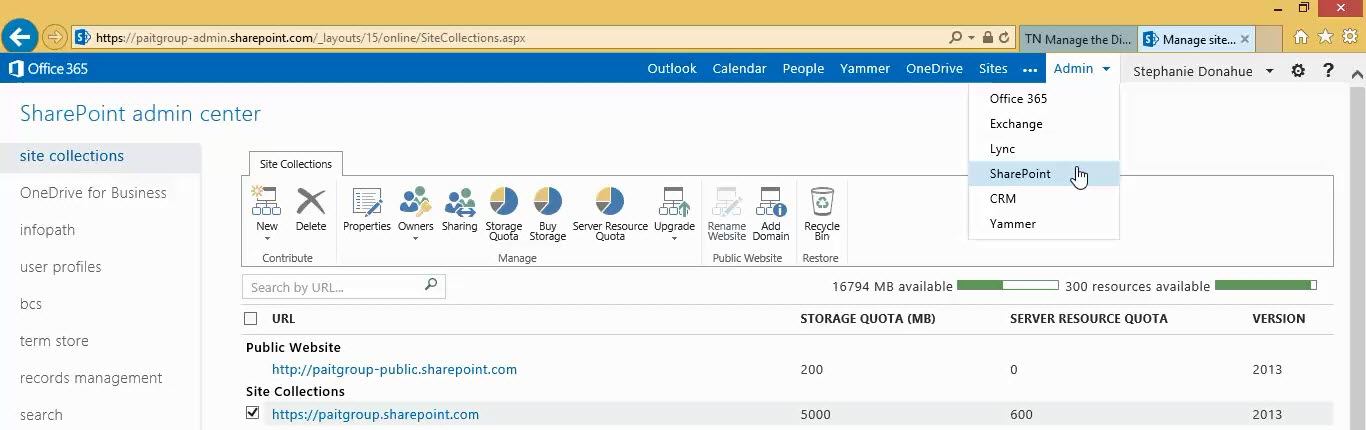
You will be presented with a list of site collections as the default page for your SharePoint admin center. It is here that we can set the external sharing.
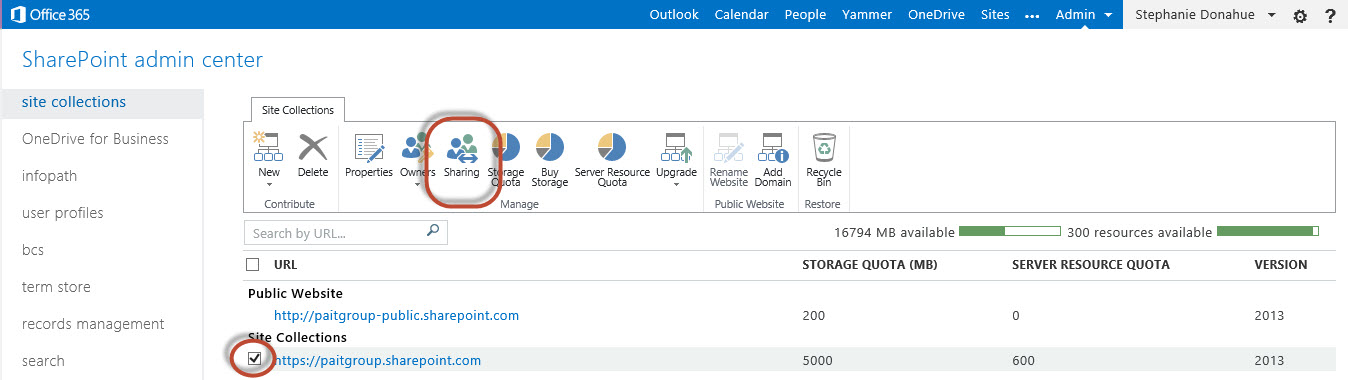
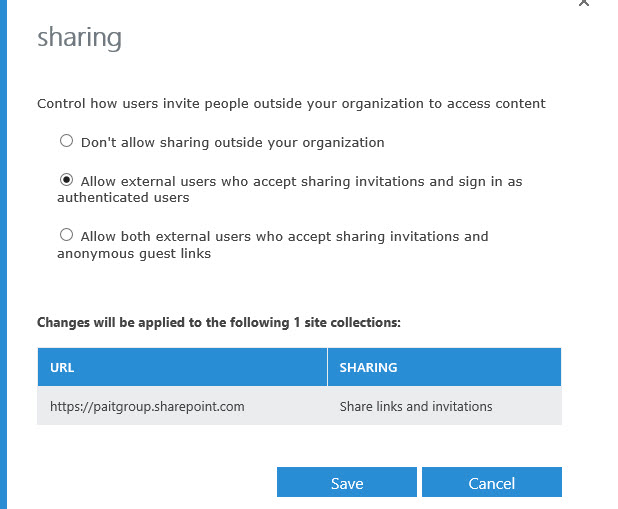
Select the site collection you wish to enable external access on, and select the Sharing button.
You are presented with 3 options – don’t allow sharing (default), allow authenticated users, and allow authenticated AND anonymous guest users. My recommendation is to allow only authenticated users in most scenarios. Allowing anonymous users into your environment should be paired with governance and planning!
Select the option appropriate for your use case scenario and click OK!
Now that we’ve added the ability to add external users, we need to navigate out to the actual site and add them.
Navigate back out to your SharePoint site and select Site Settings > Site permissions
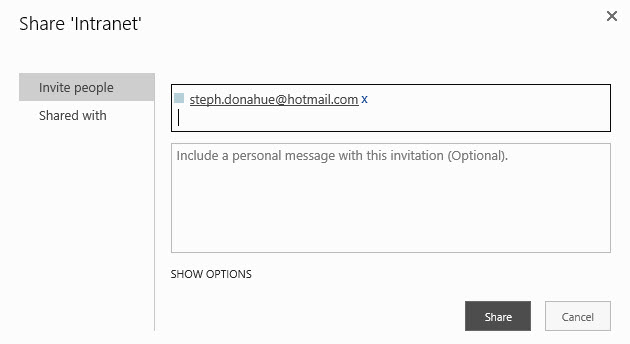
Select which group (hint: not the owners group:) you want the external user added to, for example, Visitors, and click Add User
Type the external user’s email address in the “Invite People” box – you’ll notice that the external email address will underline as shown below. Type an optional message to the user (note: the shorter the better – I always sent a separate “regular” email to ensure they know to look for the invitation. )
Under “Show Options” you can remove the check box for “send email” but this is not recommended.
Then click Share.
[Real world experience hints: I’ve seen the sharing invite fail to send when the personal message is too long. I also recommend that you leave this send email box checked. I’ve seen instances where the user can easily log into the site using the link shared in email, but when navigating directly to the page for the first time, they aren’t properly prompted for authentication.]
Now – you’re basically done, but the user does not have access to the site until they accept your invitation. You will NOT see them show up under Site Permissions yet.
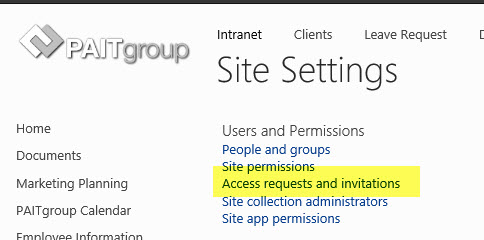
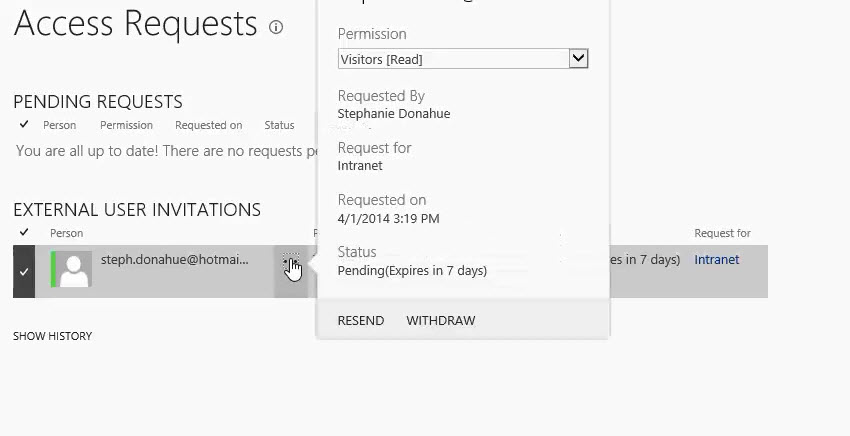
Navigate to Site Settings ….you’ll notice a new option under Site Permissions called Access requests and invitations.
Clicking this link will show you all of the pending invitations to the site. You’ll also notice a default expiration date.
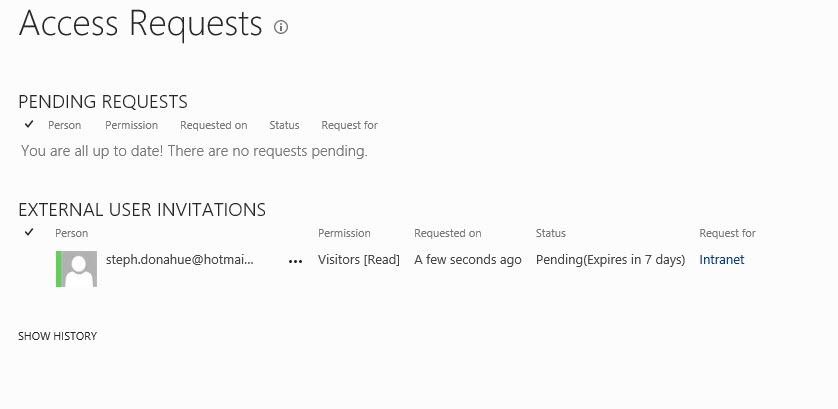
By clicking the ellipses, you will see additional options for re-sending or withdrawing the invitation. From that window there is also an option to change the permissions granted while the invitation is still pending.
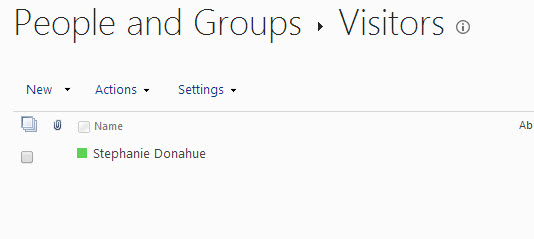
Once the user has accepted the invitation by clicking the link in the email they receive, you will now see the user added under the group you chose to add them too. In this example, we can see the user has been added to Visitors.
And that’s it! We are done. By adding external users to SharePoint Online, we are able to collaborate with vendors, suppliers and other users more effectively.
As a reminder, whenever dealing with permissions, especially those that involve external users, its always important to plan ahead and put a lot of consideration into who you are allowing into your site. For more information on permissions planning see this article from Microsoft: http://technet.microsoft.com/en-us/library/cc262939(v=office.15).aspx